GridMaker - Help

We appreciate that time is valuable, so if you need immediate help or you have a question - please feel free to give us a call on 0115 929 3419 or email support@opeus.org

Help Subjects:

Printable Version: Click here to open a copy of this help page in a new (printable) window.

Grid Location

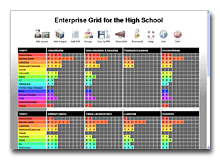
Your Grid is located online at a specific web address, for example: www.gridmaker.net/yourschool. You can inform teaching staff and students of your Grid by using this web address in documents, newsletters, websites and emails. You can also share this web address using the built-in "Share" feature.

top


Passwords

When someone enters the web address of your Grid in their browser - they will be prompted for a password. Your Grid has three passwords;

'Teacher' Password The ‘Teacher’ password is used by all members of staff responsible for adding SMSC activities to the Grid. It also enables teachers to filter the Grid and create PDF reports.

'Guest' PasswordThe ‘Guest’ password is used by all those who need to view the SMSC Grid, but are not permitted to add or edit the information it contains. It’s normally used by those who are invited to review your school’s SMSC provision, e.g. parents, staff at other schools and Ofsted inspectors.

'Admin' Password The ‘Admin’ password is used only by members of staff responsible for the configuration and management of the SMSC Grid. It allows the administrator(s) to customise the subjects, groups and criteria, as well as change passwords and other settings

When logged in with the admin password you can click on the "Passwords" icon at the top of the screen to change the passwords.

                                                                                                                                                                                                                       top


Projects/Activities


To add a new project/activity, simply click on the "Add Project/Activity" icon at the top of the screen.

To edit an existing project/activity, click on the cell where it appears in the Grid.

For each project/activity:

  • Select a Subject (The subject in which the project/activity occurs, eg. "Science".)
  • Select a Group/Year (The year group the project/activity applies to. Choose "All" if it applies to all learners.)
  • Enter a Title (A short title identifying the project/activity.)
  • Enter a Description (A description of the project/activity.)
  • Tick the relevant Criteria (The criteria which are covered in the project/activity.)
  • Add a Download (The download can be any file format (.pdf, .doc, .pub etc) and contain additional information or resources for the project/activity.)

Note: Remember that the available subjects/groups/criteria can be customised to suit your school (see below).

top


Save to PDF

You may want to produce a printed copy of your Grid. To do this we recommend that you first save your Grid as a PDF file (Adobe PDF) by clicking the "Save to PDF" icon at the top of the screen.

The PDF version of your Grid should automatically open in Adobe Acrobat Reader (freely available at http://www.adobe.com/products/acrobat/readstep2.html) To print the PDF, simply click the "Print" icon on the Acrobat toolbar.

Because the PDF version of your Grid can be viewed or distributed offline like any other file - it is ideal for situations where you want to view the Grid without using the web browser.

top


Share Grid

The simplest way to share your Grid with others is by using the built-in "Share" tool. This facility enables you to send an email message to multiple recipients containing a link.

To use the tool simply click on the "Share" icon at the top of the screen.

Firstly, customise the message in the text box.

Then, enter a "From Name:". (This is the name of the person or department that the message will appear to be from.)

Then customise the "From Email Address" and the message "Subject".

Finally, you need to enter comma-separated list of recipient email addresses. The list should look something like: "email@website.com,email@website.com,email@website.com"

To send the message - just click the "Send" button.

top


Subjects

Although we prepare your Grid with a range of standard curriculum subjects, you may want to edit or delete these.

To remove or edit an existing subject, click on the subject where it appears in the Grid.

To add a new subject, simply click on the "Add Subject" icon at the top of the screen.

top


Criteria

To remove or edit an existing criteria, click on the criteria where it appears in the Grid.

To add a new criteria, click on the "Add Criteria" icon at the top of the screen

top


Groups

To edit the Groups, click on the "Groups" icon at the top of the screen.

top


Exit

When you have finished editing the Grid - please click the "Exit" icon at the top of the screen or close the web browser application.

top